Gift Card Sleeve
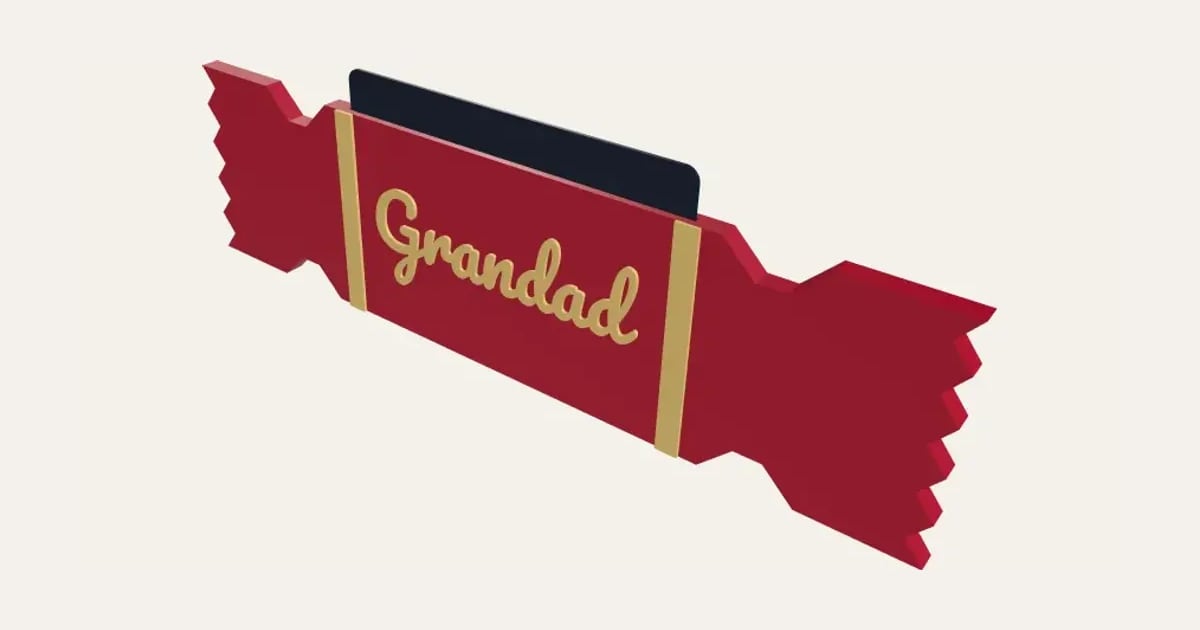
A sleeve a gift card or folded notes drops into, shaped like a Christmas cracker or an envelope, with the name standing out on the front. The card’s top shows, so it pulls out easily. Prints flat in two halves that peg together, no supports.
Customise it in your browser, then download a print-ready STL, or a multi-colour 3MF. No CAD skills needed.
About the Gift Card Sleeve
A gift card sleeve: a flat holder the card (or folded notes) drops into from the top, shaped like a Christmas cracker with frilled ends and two bands, or like an envelope with its flap drawn on, and the name standing out on the front in a second colour. The top of the card shows, so it slides out easily.
What you can change
- Type your own name on the front.
- Make one, or a whole batch at once: paste a list of names and get one each.
- Shape: christmas cracker and envelope.
- Font: 33 to choose from, from script to stencil.
- Print it: in two halves, flat and in one piece, standing up.
- Pegs: snug: press together and loose: glue together.
- Pick the sleeve and name and bands colours.
- Adjust card, wide, card, tall, pocket, thick and card showing above the top, and more.
What you download
An STL for any slicer, and a 3MF with each colour as its own part, ready for an AMS or a filament change.
Printing it
In two halves (as standard) it prints flat with no supports: the front half face up, so add a filament change where the name and bands start for the second colour. Press the back half's pegs into the front's holes; if they're loose (or you chose loose pegs), a drop of superglue on each holds it. In one piece it prints standing up, no supports, and a second colour needs an AMS; a brim helps it stay put while it grows tall.
Read: 12 personalised Christmas decorations you can 3D print this year
Questions
What fits inside?
A gift card (86 × 54 mm) as standard. For folded notes, set the card size to the folded note and make the pocket thicker.
Do I need a multi-colour printer?
No. It prints in two flat halves as standard, the front face up, so the name and bands are its top layers: pause and change filament where they start. (Printed in one piece standing up, the name is beside the sleeve in every layer, so that needs an AMS.)
How do the halves go together?
Little pegs on the back half press into holes round the front half’s rim. Snug pegs hold by themselves; if yours are loose, or you picked loose pegs, put a drop of superglue on each before you press them together.
Which printers and slicers does it work with?
Any FDM printer. The STL opens in every slicer; the 3MF keeps the colours as separate parts in Bambu Studio, Orca Slicer, PrusaSlicer and Cura. Pick your printer in the designer to check it fits the plate.
Can I sell what I make?
On Pro and Ultimate you can sell the prints you make, for example on Etsy or at craft fairs, for as long as your membership is active: if it ends, stop selling them. On Free and Maker, print it for yourself or give it as a gift. The STL and 3MF files themselves are never for sharing or selling.
More Christmas
- Snowflake Name
- Magic Santa Key
- Advent Numbers
- Tree Topper Star
- Line Art Ornaments
- Ribbed Christmas Trees
- Ribbed Finial Bauble
- Christmas Napkin Holder
- Christmas Napkin Rings
- Christmas Tree Snack Tray
- Advent Calendar Drawers
- Christmas Shaped Box
- Photo Bauble
- Christmas Clicker
- Stocking Holder
- Gift Card Tree
- Christmas Village House
- Santa Treat Plate
- Christmas Card Display
- Elf Props
- Christmas Stockings Print
- Christmas Cracker Toys
- Bauble Name Tags
- Reindeer Food Pot
- Sleeps Till Christmas Countdown
- Bottle Neck Tag
- Gift Card Present Box
- Name Bauble
- Gingerbread Man Ornament
- Chocolate Holder Ornament
- Slot-Together Christmas Tree